Blog

  • Mastering Raglan Jumper Construction

    Mastering Raglan Jumper Construction

    Crafting your very own raglan jumper can be both a rewarding and enjoyable experience, but the construction process can sometimes seem like a daunting puzzle. I have only recently learnt myself, and it was nowhere near as difficult as I had imagined! It is so easy once you get into it, and the construction is stunning, with no seams and barely any ends to tie in. You can also transfer the piece to a long cable to try it on as you go. This is so helpful as you can't usually do this when knitting flats, and it ensures a perfect fit. If you are uncertain about a raglan or want to refine your technique, this blog post will guide you through mastering the art of raglan jumper construction.


    Understanding Raglan Shaping Techniques


    Raglan Construction Basics: Raglan sleeves are a popular choice for jumpers due to their seamless design that extends from the collar to the underarm. This unique construction technique eliminates the need for shoulder seams, providing a flattering and more relaxed fit for greater ease of movement. This construction can be seen in the diagram below; the increases radiate from the neckline at 4 points.

    Casting On: To calculate the number of stitches to cast on, knit a tension swatch and then work out how many stitches will be required to fit around the neck (and over the head). This stitch number may need to be adapted slightly as the stitches need to be split up and marked to separate the front/back and sleeves in the correct ratio.


    Stitch Marking: Each diagonal raglan line will be 2 stitches wide so deduct 8 from the total stitch number. From the number of remaining stitches, 1/3 should be used for the front, 1/3 for the back and 1/6 each for the sleeves. So the sleeves should start having half the number of stitches as the front and back. Stitch markers can be placed on the first row; they can either be placed in between the 2 raglan stitches, or 2 markers can be placed on either side of these 2 stitches


    Traditional Increase Method: Typically, raglan shaping involves increasing along the raglan line to create a distinctive diagonal sleeve. You can achieve a smooth and structured raglan line by working these increases at specific intervals. The easiest way is to start by knitting 1 row and then work increases on every other row until the desired length is reached.


    Splitting Body and Sleeves: Once the garment has been tried on and reaches the armpit, it is time to split the main body and sleeves to be worked separately. Each section needs to be split between the 2 raglan stitches and some stitches cast on under the arm.


    Working Body and Sleeves: The sleeves can be held on waste yarn while you continue to knit the body in the round until the desired length is reached. The body can be shaped with some decreases or just worked straight down. Then, each sleeve can be picked up and knitted to the desired length. Again, it can be shaped with decreases or just worked straight down.


    Tips for Raglan Construction


    Stitch Marker Placement: Stitch markers are crucial in keeping track of your raglan shaping. Strategically placing markers at key intervals can help you stay on track and maintain symmetry in your project.


    Designing with Increases: The raglan lines can be accentuated as a design feature, either by intentionally using increase methods that create holes or adding another decorative element like a cable


    Neck Shaping: A basic raglan doesn't need neck shaping but if you want to elevate your design then you can shape the neck for a better fit. This can be achieved by working short rows in the round or starting off knitting backwards and forwards and working increases before switching to working in the round.


    Blocking Magic: Don't underestimate the power of blocking. After completing your raglan jumper, blocking can enhance the overall shape and drape of the garment, refining the finished look.


    Choosing the Right Yarn for Your Project


    Fibre Selection: When selecting yarn for your raglan jumper, consider both the aesthetic and practical aspects of different fibre types. Merino wool offers warmth and softness, while cotton yarn is ideal for breathable and lightweight garments.


    Weight Matters: The weight of the yarn will influence the drape and texture of your jumper. Worsted weight yarn is a versatile choice for raglan construction, providing a balance between warmth and stitch definition. A particularly heavy yarn may make the jumper very weighty and pull downwards, putting stress on the neck and shoulders.


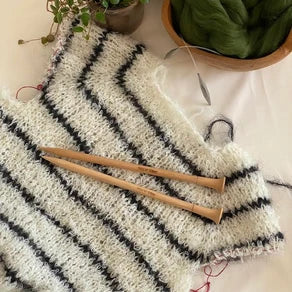
    Colour Co-ordination: Experiment with colour combinations to elevate your raglan jumper. Whether you opt for tonal hues or bold contrasts, the right colour palette can enhance the design details of your project. Stripes work particularly well as they follow the raglan shaping around the neck beautifully.


    Mastering raglan jumper construction opens up a world of creative possibilities, allowing you to craft personalised garments with a seamless finish. By familiarising yourself with different shaping techniques, embracing seamless construction methods, and carefully selecting the perfect yarn, you can embark on a journey of creativity and craftsmanship.


    I hope this has helped you learn more about raglan knitting, or even just boosted your confidence! We would love to see what you're making so tag us on Instagram @craftyllama, and let us know how your raglans are going!


    Happy knitting!

    Jonah

    Continue reading
  • Knitting stitches and how to knit them

    Knitting stitches and how to knit them

    We have collated a collection of our favourite knitting stitches, along with images and instructions for knitting the swatches both flat and in the round (if possible). These are perfect for a beginner knitter wanting to expand their skill set or even an advanced knitter looking to add another stitch to their library. Don't forget to play around with colour, texture and scale. Experimenting with these can transform the appearance of the stitch and create truly unique results!


    Abbreviations:

    RS - Right side

    WS - Wrong side

    K - Knit

    P - Purl

    YF - Yarn forward

    K2TOG - Knit two together

    SL1 - Slip 1 stitch from left to right needle, purlwise

     
    Green eyelet knitting sample in a lace stitches technique on big 10mm needles
     

    Offset Eyelet Stitch

    This is a beautiful stitch with plenty of negative space. Its construction method is interesting, using increase and decrease techniques to create the eyelet lace holes.


    Flat

    Cast on an odd number of stitches

    RS: K1, [YF, K2TOG] repeat [] until end of row

    WS: Purl

    RS: [YF, K2TOG], repeat [] until 1 stitch remains, K1

    WS: Purl

    Repeat these 4 rows until desired length


    Grey sample square knitted in broken rib stitch.
     

    Broken Rib Stitch

    This is such a fun variation on a classic rib! It is a super simple stitch to learn, with only a two-row repeat.


    Flat Cast on an odd number of stitches

    RS: Knit

    WS: P1, [K1 P1], repeat [] until end of row

    Repeat the last 2 rows until desired length

    In the round

    Cast on an even amount of stitches

    Round 1: Knit

    Round 2: [K1, P1], repeat [] until end of row

    Repeat the last 2 rows until desired length


    A sample of the drop stitch knitted in a green variegated yarn held with a charcoal grey yarn.
     

    Drop Stitch

    The wrapping technique creates elongated knit stitches, resulting in a looser, more open fabric with plenty of squish.

    Flat

    Cast on any number of stitches

    Row 1: Knit

    Row 2: Purl

    Row 3: Knit each stitch as usual, but wrap your yarn twice around the needle

    Row 4: Purl each stitch as usual, but drop the extra wrap as you finish purling the stitch

    Repeat rows 1-4 until desired length


    In the round

    Work the same as flat, but knit the purl rows.


    A pink knitted double stockinette sample in progress on HiyaHiya Steel knitting needles.
     

    Double Stockinette

    So squishy! I love the look of stockinette but get frustrated with the edges rolling or curling. This stitch solves that, and you get double-sided fabric. The downside is that it is a very time-consuming stitch, as you are essentially working each 'row' twice.


    Flat

    Cast on an even amount of stitches

    [K1, SL1 with the yarn in front] until end of row

    Repeat last row until desired length


    In the round

    Cast on an even amount of stitches

    Round 1: [SL1 with the yarn in front, K1] until end of row

    Round 2: [P1, SL1 with the yarn in back] until end of row

    Repeat last 2 rounds until desired length.

    Blue variegated yarn knit into moss stitch
     

    Moss stitch

    The structure of knit and purl stitches in this fabric creates a dense, textured knit.


    Flat

    Cast on an even amount of stitches

    Row 1 + 2: [K1, P1], repeat [] until end of row

    Row 3 & 4: [P1, K1], repeat [] until end of row

    Repeat the last 4 rows until desired length


    In the round

    Cast on an even amount of stitches

    Round 1 & 2: [K1, P1], repeat [] until end of round

    Round 3 & 4: [P1, K1], repeat [] until end of round

    Repeat the last 4 round until desired length


    What was your favourite stitch? I would love to see if you try any of these stitches. Tag us on Instagram @craftyllama Happy knitting, Rosie x

    Continue reading
  • 5 sweater patterns on Ravelry

    5 sweater patterns on Ravelry

    Sweater season is nearly over! It didn't feel long enough this year. I still have so many winter projects I wanted to knit, but I reckon there's time for one more. So I've rounded up some of my favourite sweater patterns on Ravelry at the moment.


    I recently came across Ranti Studio on Instagram and love her designs. She has such a great range of modern knitting patterns on her website and Ravelry, suitable for both beginners and more advanced knitters. The Chalet Jumper uses two strands of aran-weight yarn held together, which creates the two-toned effect. This is a great beginner-friendly method for using multiple colours, and there are endless possibilities. The garter stitch cuffs and rolled rib neckline are my favourite details. The range of techniques in this sweater makes it the perfect project to learn something new. I am excited to get this one on my needles!


    We have aran-weight yarn available here.


    The texture on the jumper is beautiful, and the cables running down the sleeve are such a statement design feature. This pattern uses lace and fingering weight yarns held together, one of my favourite techniques when knitting up sweaters, as it leaves you with so many yarn choices and texture options. The seamless construction makes for an easy-going knit on the body and something a little more complicated when working on the sleeves. I love these kinds of projects as I can choose to work on the mindless knitting or the harder parts when I am feeling motivated.


    We have fingering-weight yarn available here.


    A super versatile pattern pack!! There are instructions to knit this sweater with or without waist shaping, cropped or standard length, folded neckband or turtle neck and an option to add short rows in the chest to make more room if needed. There are multiple choices for pattern design, and the repeats only ever use two colours at a time, so it is perfect for a first colour-work project. There are also tips for experimenting with your own pattern. The pack is a little on the pricier side, but you get all the instructions to make a huge variety of sweaters, and you could even knit it up in a plain colour, too! Lydia also offers more accessible pricing options; there are more details on the Ravelry pattern page.


    We have DK-weight yarn available in lots of colours here.


    I love the relaxed fit combined with fun details like the split seam and long rib in this sweater. I think it's really flattering and looks like a super fun knit, with lots of different elements and details keeping it interesting. It is worked up with a DK-weight wool run with a lace-weight silk mohair. I would love to try this with a neutral colour base and a bright silk mohair to make a contrasting fuzz effect. There are lots of projects using this pattern on Ravelry if you are looking for some inspo.


    We have DK-weight yarn available here.


    The combination of ribs and cables in this sweater is so sophisticated and creates such a nice structured sweater. I am dying to make this in a cobalt blue or lime green. I think the pop of colour would contrast nicely with the refined design features. This project uses three yarns run together, which gives you unlimited fabric choices; swatching for this one would be so fun!


    I hope you have enjoyed my sweater roundup. I am struggling to pick a last project for the winter season, but I think it's going to have to be The Chalet Jumper by Ranti Studio; I just need to make a decision on yarn. What is your favourite make of this sweater season? I'd love to hear about it in the comments.


    Don't forget to check out the website for yarn and a HUGE selection of knitting needles.


    Happy knitting,

    Rosie x

    Continue reading
  • Introducing Phoenix Needles

    Introducing Phoenix Needles

    Fuel your Fire, Needle your Dreams

    Welcome to Phoenix Needles, where craftsmanship and sustainability converge to offer you a range of eco-conscious crafting essentials. The handmade wooden knitting needles and crochet hooks are meticulously crafted from responsibly sourced wood, embodying their dedication to minimising environmental impact. In addition to the renowned needles and hooks, they also offer a selection of tools and notions, such as yarn bowls, swifts, winders and gauges, designed to complement your crafting journey while supporting sustainability. Join us in this introductory post as we delve into the world of Phoenix Needles.


    Phoenix Needles offers a diverse range of responsibly sourced woods for their handmade knitting needles and crochet hooks. Each wood type, including Sheesham, Maple, Palm, Bamboo, Birch, and Rosewood, brings unique characteristics to the crafting experience, catering to different preferences and project needs. From the classic elegance of Sheesham to the eco-friendly properties of Bamboo, artisans can choose a wood type that aligns with their sustainability values while enjoying quality craftsmanship at Phoenix Needles.


    Knitting Needles

    Double-pointed needles are ideal for projects requiring knitting in the round with a small circumference, such as socks, sleeves, and hats. Their pointed ends make them perfect for intricate stitch work and shaping. On the other hand, fixed circular needles feature two needle tips connected by a flexible cable, making them suitable for larger projects like sweaters, blankets, and shawls. They allow stitches to be distributed evenly across the cable, reducing strain on the hands and wrists during long knitting sessions. Whether you're working on small or large projects, Phoenix Needles provides the perfect tools to elevate your knitting experience.


    Crochet hooks

    Explore Phoenix Needles' diverse range of crochet hooks, catering to the needs of every crocheter. The Acer Tunisian hooks, measuring 30cm long, are tailored for wider projects such as scarves or cushions, offering both versatility and comfort. Additionally, the jumbo-sized ergonomic hooks, available in sizes 16mm, 19mm, and 25mm, are designed to handle chunky projects with ease, providing a comfortable grip throughout. Phoenix Needles also offers a variety of other ergonomic designs in smaller sizes, ranging from 3mm, catering to different preferences and project requirements. For those who prefer standard hooks, the Gold and Scarlet styles are stocked in sizes from 3mm to 10mm, ensuring a suitable option for every crochet project.


    Swifts & Winders

    Experience the perfect blend of style and efficiency with the Phoenix Handmade Wooden Yarn Swift & Winder. Crafted from your choice of Sheesham or Maple Wood, these tools offer a satisfying and effortless way to wind yarn skeins and balls. Keep your stash tidy and organised with this elegant duo. Whether you're a seasoned crafter or just starting out, the Phoenix Swift & Winder will elevate your crafting experience to new heights of ease and convenience.


    Yarn Bowls

    Crafted with meticulous attention to detail, Phoenix yarn bowls are the ultimate companion for your knitting and crochet projects. Designed to keep your yarn tidy and secure, these bowls feature a smooth, polished surface that prevents snags and tangles, ensuring your yarn flows freely as you create. Available in elegant designs crafted from both Sheesham and Multiwood, there's a perfect option for every crafter's aesthetic preferences. Enhance your experience with Phoenix yarn bowls and enjoy the seamless flow of creativity with every stitch.


    Ready to elevate your crafting experience? Visit our website today to explore the full range of Phoenix Needles products.


    Happy shopping,

    Rosie x

    Continue reading